
Automating Auth0 Actions and Triggers with Terraform
Introduction
In a previous article, we explored how to customize Auth0 using Actions and Triggers. If you’re new to these concepts, I recommend reading that article first.
In this article, we’ll take the next step by automating Auth0 configurations using Terraform. Instead of making manual changes through the Auth0 Dashboard, we’ll manage our identity infrastructure as code, making it reproducible, version-controlled, and CI/CD-friendly.
If you’re new to the Auth0 Terraform Provider, I also recommend reviewing my introductory article on configuring Auth0 with Terraform before continuing.
Overview
In this article, we will:
- Automate Auth0 Actions and Triggers using Terraform
- Restrict access to a client application (
custom-client) during weekends - Deploy the configuration as Infrastructure as Code (IaC)
Why Use Terraform for Auth0?
Using the Auth0 Terraform Provider offers several advantages:
- Eliminate manual configuration errors
- Enable CI/CD deployment pipelines
- Version-control IAM configurations
- Create repeatable environments (Development, QA, Production)
- Simplify infrastructure management
Prerequisites
1. Machine-to-Machine (M2M) Application
Create a Machine-to-Machine (M2M) application in Auth0.
Authorize it to access the Auth0 Management API and assign the required permissions (following the principle of least privilege for production environments).
Make a note of:
- Auth0 Domain
- Client ID
- Client Secret
For more details, refer to the overview section of my Auth0 Terraform Provider article.
2. Client Application
Create the client application that will be protected by the Action.
In this example, the client application is named:
custom-clientProject Structure
auth0-terraform/
│
├── main.tf
├── providers.tf
├── variables.tf
└── actions/
    └── control-access.js
Step 1 – Configure the Terraform Provider
providers.tf
terraform {
  required_providers {
    auth0 = {
      source  = "auth0/auth0"
      version = "~> 1.0"
    }
  }
}

provider "auth0" {
  domain        = var.auth0_domain
  client_id     = var.auth0_client_id
  client_secret = var.auth0_client_secret
}
Step 2 – Define Variables
variables.tf
variable "auth0_domain" {}

variable "auth0_client_id" {}

variable "auth0_client_secret" {
  sensitive = true
}
Step 3 – Set Terraform Variables
Copy the values from your registered Machine-to-Machine application.
export TF_VAR_auth0_domain="your-auth0-domain"

export TF_VAR_auth0_client_id="your-auth0-client-id"

export TF_VAR_auth0_client_secret="your-auth0-client-secret"
Windows PowerShell users can use
$env:TF_VAR_auth0_domain=...instead ofexport.
Step 4 – Create the Action and Attach It to the Trigger
Terraform Configuration
main.tf
resource "auth0_action" "custom_action" {

  name    = "control-access"
  runtime = "node18"

  code = file("${path.module}/actions/control-access.js")

  deploy = true

  supported_triggers {
    id      = "post-login"
    version = "v3"
  }
}

resource "auth0_trigger_actions" "login_flow" {

  trigger = "post-login"

  actions {
    id           = auth0_action.custom_action.id
    display_name = auth0_action.custom_action.name
  }

}
Action Code
actions/control-access.js
exports.onExecutePostLogin = async (event, api) => {

  if (event.client.name === "custom-client") {

    const d = new Date().getDay();

    // 0 = Sunday
    // 6 = Saturday

    if (d === 0 || d === 6) {
      api.access.deny("This app is only available during weekdays");
    }
  }

};
The Action checks whether the user is logging into the custom-client application.
If the login occurs on Saturday or Sunday, access is denied before tokens are issued.
Step 5 – Deploy the Configuration
Run the following Terraform commands:
terraform init

terraform plan

terraform apply
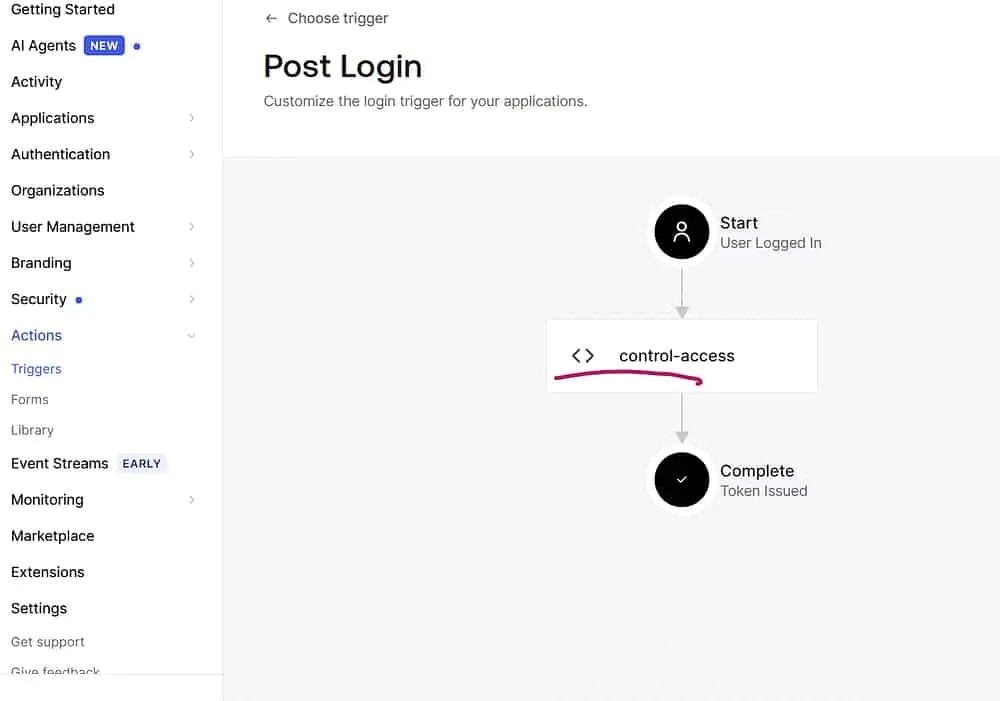
After successful deployment:
- The Action is created
- The Action is deployed
- The Action is attached to the Post Login trigger
Verification
Launch the custom-client application.
Expected behavior:
- Monday–Friday: Login succeeds
- Saturday–Sunday: Login is denied with the configured message
You can also verify execution from:
Auth0 Dashboard → Monitoring → Logs
Best Practices
- Keep Action source code under version control.
- Avoid storing secrets inside Terraform files.
- Use Terraform variables or secret-management solutions.
- Grant only the minimum Management API permissions required.
- Promote the same Terraform configuration across Development, QA, and Production environments.
Summary
In this article, we automated Auth0 customization using Terraform by provisioning an Action and attaching it to the Post Login trigger.
Managing Auth0 configurations as code provides several benefits:
- Consistent deployments
- Repeatable environments
- Easier code reviews
- Better collaboration
- Seamless integration with modern DevOps and CI/CD pipelines
Infrastructure as Code is a recommended approach for managing identity platforms at scale, reducing manual effort while improving reliability and maintainability.